Design of a 3D Printing Hotend
I recently bought a used 3d printer. And as you all know, getting a 3d printer to work is a hobby by itself. In my case I updated the firmware by configuring marlin for the printer and fixed the poor performance of the heater catrige by properly connecting the board to the power supply (took me a while to figure that one out).
And then there was the hotend. When trying to print PLA the filament always got stuck. In the cold end the hobbed bolt would start grinding into the filament. The only way to to get it to work was to manually and carefully feed the filament until it was properly flowing through the hotend and then immediately start printing. Wait for 15 seconds, and the hotend would be stuck again.
This got me thinking. And reading. In summary, an extruder consists of a cold side, where the filament is forced towards the nozzle. The filament passes through some sort of isolation or heat break and reaches the hot end, which is hot, thus melting the filament. The melted filament is then pressed throught the nozzle. The critical part is the heat break. As soon as the PLA reaches a temperature of about 60 degrees celsius, it softens and starts to melt. At that temperature it isn’t a thin fluid like water, but a thick, viscous mass that presses and sticks to the walls surrounding it. And this makes it hard to push it through the heatbreak. As the PLA moves towards the hotend it gets hotter and thus thinner and less viscous.
The key to a well working hotend is to keep the melting zone short. If the PLA is at it’s highly viscous temperature only for a millimeter or even less, the forces required to extrude it are manageable. If you have 10 millimeters of that thick sticky stuff to push forward, good luck gripping the filament hard enough.
One way to shorten the melting zone is to use a PTFE (teflon) tube to guide the filament to the hot end. It can come cold down the tube and gets heated right when it hits the hot end. Even better, you have the anti-stick properties of teflon. However this approach has two downsides: First, if you are not printing the tube and the filament get slowly heatened up from the hot end (heat creep), and you get a long melting zone. Starting to print again might be difficult. And second, you should not heat teflon to more than 260 degrees celcius (toxic fumes). But even at 220 degrees it detoriates over time. And this is damn close to the PLA printing temperatures of 180 to 220 degrees. And if you want to go for ABS (printing temperature 240-270 degrees), teflon is definitely a bad idea.
So I wanted to stay on the all-metal side. The key is to shorten the heat break. But this increases the thermal conductivity, which can be mitigated by making the walls of the heat break thinner. The currently most popular hotend is the e3d V6:
 (image by Agustin Flowalistik)
As you can see, the heater is held in place by the heat break. This limits how thin the heat break can become. This has been recognized by the engineers at slice engineering, leading to the mosquito hotend. The key idea is to take the mechanical load off the heat break. The mosquito hotend is a premium product and probably the best hotend you can get. It isn’t cheap as well (around 150 USD), about the same as my whole second hand 3d printer.
This got me thinking if I could take the same key idea and make a far more affordable hotend. Turned out I can.
Physics
How does the length of and thickness of the heat break invluence thermal conductivity? I’ll use stainless steel for the heat break because it is commonly available and has a relatively low thermal conductivity of k = 15 W/mK. The heat sink and heater block are made of aluminium with a conductivity about 10 times higher in the neighborhood of 150 W/mK.
To get the amount of heat P[W] flowing through a heat break with a temperature difference T[K] of length L[m] and cross section A[m2], the formula is P=kTA/L. In our case, the temperatures are about 30 degrees celcius for the heat sink and 200 degrees for the heater block, thus there is a difference of about 170K. For the e3d V6 original L=2.1mm and A=PI/4*(4.1mm^2-3.2mm^2)=5.16mm^2, resulting P=6.27W.
I did some test turns for a heat break and found out that a wall thickness of 0.1mm is pretty easy to achieve. The table below shows some combinations:
| d1 | d2 | A[mm^2] | L | P[W] |
|---|---|---|---|---|
| 4.1 | 3.2 | 5.16 | 2.1 | 6.27 |
| 3.2 | 3 | 0.97 | 1 | 2.48 |
| 3.2 | 3 | 0.97 | 0.5 | 4.97 |
| 3.3 | 3 | 1.48 | 1 | 3.79 |
| 3.5 | 3 | 2.55 | 1 | 6.51 |
| 3.4 | 3.2 | 1.04 | 1 | 2.64 |
As you can see with thin walls the break can be as short as 0.5 mm and still has a lower heat flow than the e3d V6 original. For the hotend I built I did not want to push it and went with 3.2mm/3mm/1mm, as I also needed two M3 bolts to handle the mechanical load.
To better understand the physics I ran some FEM simulations. First the heat flux:

And the temperature:

As you can see, there are almost no temperature differences in the aluminium heat sink and heater block which would make the melting zone longer.
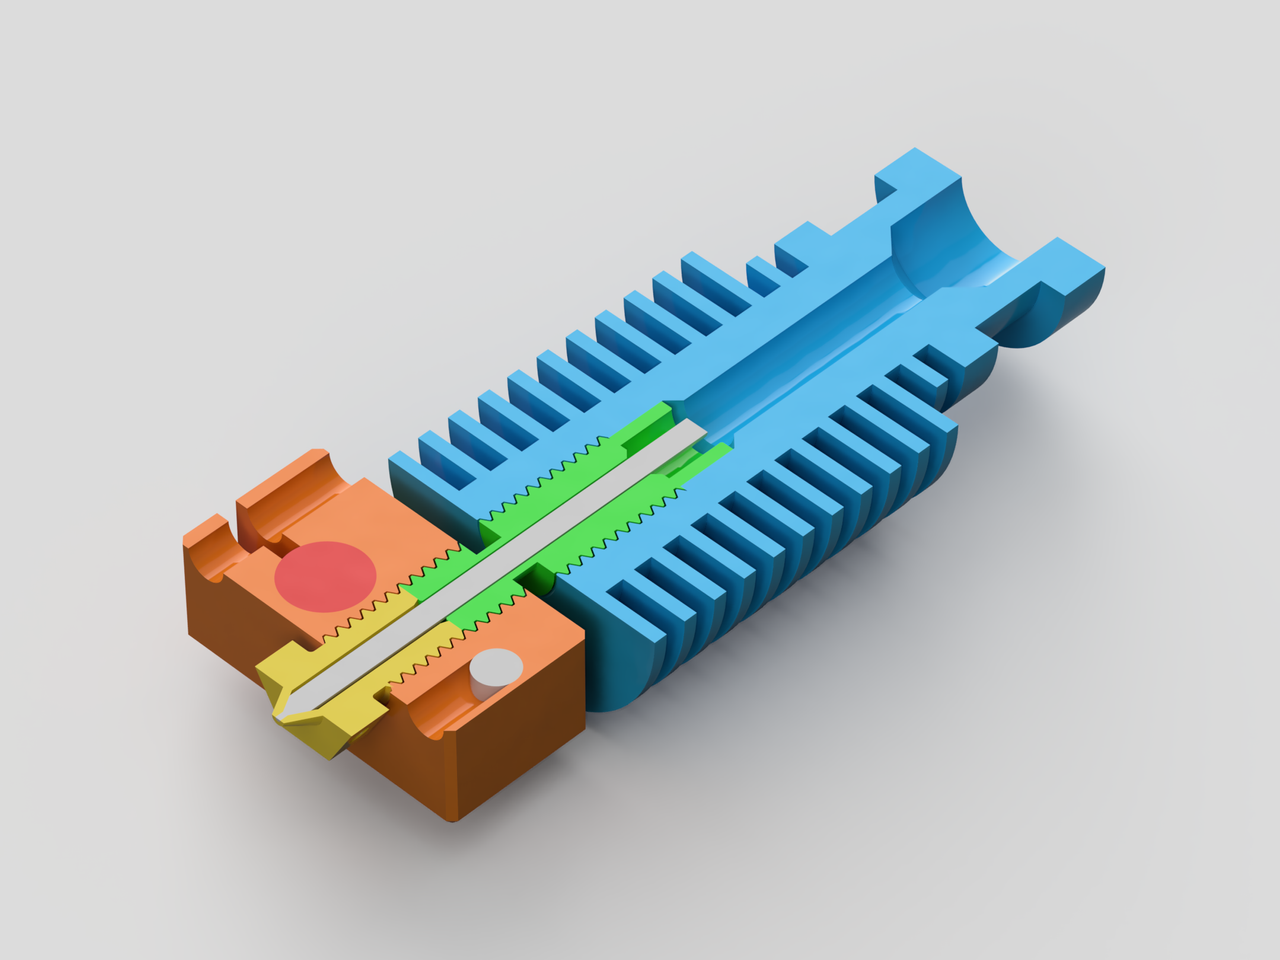
Design
I used the heat sink and heater block design of the V6, with two M3 bolts added to hold the heater block in place. For the heat break I basically went with a tube of 3mm inner diameter and 4mm outer diameter, with the heat break zone on one end. The wall thickness of the main tube should not be too big, otherwise the melting zone becomes longer due to bad heat transfer across the tube.

The next question was to have the heat break press against the heater block or against the heat sink. Pressing against the heater block has the advantage that any roughness at the contact point does not affect the filament flow as it is already melted. On the other side if the seal is not tight, the molten filament oozes out. I tried this approch, and the oozing was an issue. So I went with the heat break pressing against the heat sink.
To be able to easily replace the heat break I went with a heat break holder with the heat break pressed in (heat break outer diameter about 4.1mm). The end of the heat break is conical and presses directly against the nozzle, to avoid possible oozing out of the filament.

You can download the whole FreeCAD model.
Result
I build this hot end a few months ago and used it regularly since, without any issues.